Recovery partition
In recovery mode, you can do things like wiping partitions, backing up images etc. Recovery lives on the /dev/block/nandg partition.
Stock Android recovery
The stock Android tablet comes with a rudimentary "stock" recovery system. Here's a screenshot mockup of what it looks like (not possible to do a screenshot since ADB isn't available):
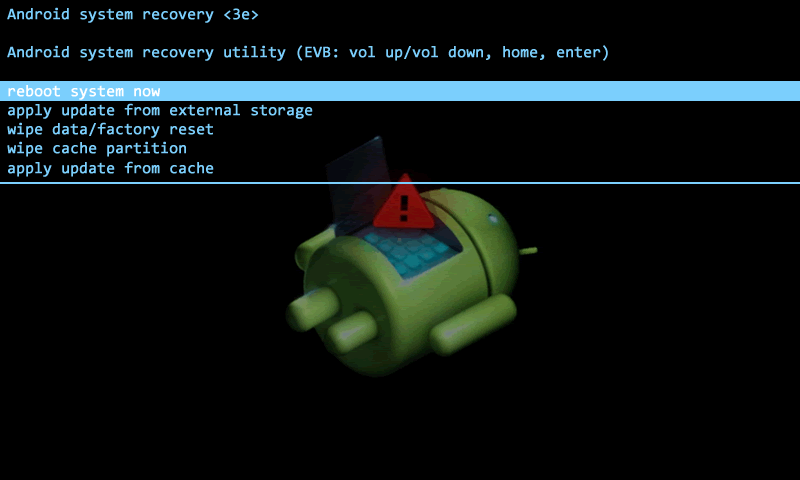
This has some serious problems:
- It can only be accessed by rebooting from the running Android system itself, by going through Settings -> Backup & reset -> Recovery mode (Under "system upgrade").
- Unlike other recovery ROMs (e.g. CWM, see later), it cannot be accessed by some combination of pressing buttons during startup. If you do press Vol + and Power together for a while, all you get is the "belly-up" robot, with no menu.
- Whilst in stock recovery, there is no Android Debug Bridge (ADB) available. This is serious, since so much can be done using ADB (e.g. flashing or backing up ROMs).
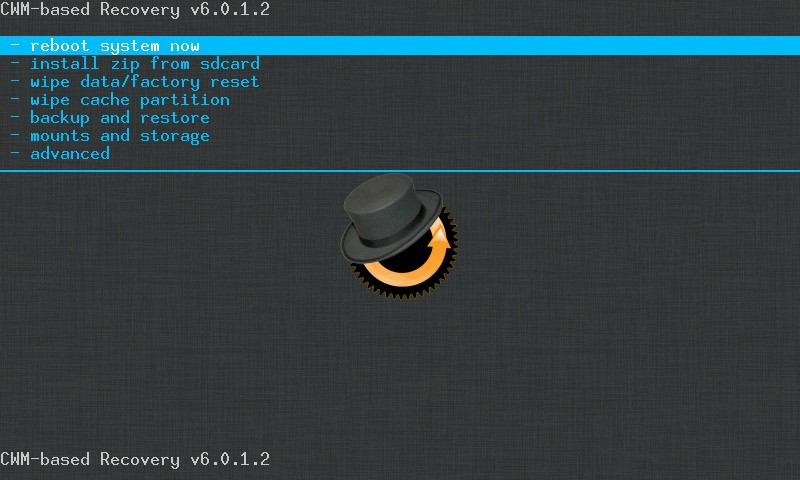
CWM Recovery v6.0.1.2
There's various custom recovery images - a popular one is Clockworkmod. This can be installed through the app "ROM Manager", but it sometimes has problems if it can't recognize your tablet. As it turned out, when I first used Uberizer to backup my partitions, it automatically installed the CWM recovery image, which works fine. Here's how to install it manually.
The image file is called "recovery.img" and is in the changer_files directory in Uberizer's main program directory. Copy it into Uberizer's main directory, since that's where we'll be running commands from.
We'll be using ADB. First, start up the tablet into full Android. Connect to the computer. Fire up a command prompt, navigate to Uberizer's directory, and start ADB:
adb devices
Use ADB to push the recovery.img file to a location on the tablet. If in full Android, I save it to the internal SD card:
adb push recovery.img /sdcard/
Next we will write the image directly to the recovery partition on the tablet. In my case, this is /dev/block/nandg - yours may be different. Run the following:
adb shell "cat /sdcard/recovery.img > /dev/block/nandg"
After a brief pause, you'll now have the new recovery partition written. Shut down the tablet.
To start up into recovery mode, press and hold the Vol + button, then press and hold the Power button until the screen lights up:
Sometimes, it doesn't boot into recovery. Try ensuring the tablet it disconnected from the USB and power, and try again.
Confusion over "sdcard"
In the normal Android system (see the summary of partitions elsewhere), sdcard refers to the internal SD card (located at /dev/block/nandj) and extsd refers to the external SD card. However, when booted into CWM recovery, things are different.
It's possible to look at the /etc/recovery.fstab file inside Uberizer's CWM recovery image (see elsewhere about unpacking and repacking the recovery image). Here's its contents:
# mount point	fstype		device

/boot		emmc		/dev/block/nandc
/cache		ext4		/dev/block/nandh
/data		ext4		/dev/block/nande
/emmc		auto		/dev/block/nandi /dev/block/nandi1
/sdcard		vfat		/dev/block/mmcblk0p1	/dev/block/mmcblk0
/sd-ext		auto		/dev/block/mmcblk0p2
/system		ext4		/dev/block/nandd
/recovery	emmc		/dev/block/nandg
From this, we can tell that sdcard actually refers to the external SD card, exactly opposite to the meaning in the fully-booted Android system! In addition, sd-ext points to /dev/block/mmcblk0p2, which is a nonexistent device (see page on partitions, under /proc/partitions).
It's possible to flash a new recovery while booted into CWM recovery. Go into mounts and storage and mount the /emmc/ partition. (This is just somewhere to storage the image file). Using the same ADB commands as before, push the recovery image to /emmc/ then cat it to /dev/block/nandg and reboot.