Unpacking and repacking recovery or boot image
The CWM recovery image is in the changer_files directory in Uberizer's main program directory. I wanted to see if it was possible to unpack it, have a look inside and/or change anything, then repack it and reflash it to the device. I got started on this because I was trying to figure out how to decipher the /dev/graphics/fb0 framebuffer when booted into CWM, and I wanted to replace CWM's stock background image by red, green, blue colours to help figure out how the framebuffer is represented.
This procedure also applies to the boot image (located in /dev/block/nandc).
There are various pages on the web on how to do this. However, some instructions didn't work for me (resulted in a non-bootable recovery image). I'll go through each step on this page and explain what did work. Uberizer version is v1.3 26th Dec 2012. The CWM version is 6.0.1.2.
Important note: The image file produced by the unpacking + repacking process may be smaller than the original image. However, this should not be a problem, provided the contents are the same. For example, I unpacked and repacked the boot image - the original image was 33554432 bytes long and the re-packed image was only 10315776 bytes long. This is because there are actually only 10315776 bytes of relevant data present - the remaining bytes in the original image were just filled with 0xFF. So, if you do get a different file size, check the files in a hex editor - the data should still be the same.
Structure of image file
According to the likes of http://forum.xda-developers.com/showthread.php?t=443994, the image consists of a 2k header, followed by a gzipped kernel, followed by a ramdisk, followed by a second stage loader (?). Representation nicked from that site:
+-----------------+
| boot header     | 1 page
+-----------------+
| kernel          | n pages
+-----------------+
| ramdisk         | m pages
+-----------------+
| second stage    | o pages
+-----------------+

n = (kernel_size + page_size - 1) / page_size
m = (ramdisk_size + page_size - 1) / page_size
o = (second_size + page_size - 1) / page_size

0. all entities are page_size aligned in flash
1. kernel and ramdisk are required (size != 0)
2. second is optional (second_size == 0 -> no second)
I don't know about the kernel so don't ask.
The steps required are these:
- Split image file into kernel and ramdisk parts
- Decompress ramdisk into real files
- (Optional) make any alterations to the files
- Compress the files back into a ramdisk
- Combine the new ramdisk with the original kernel and make a bootable image
- Flash to device and test
Steps in detail below. All require a Linux box - I'm using Ubuntu 12.04.
References
Here are several links which are referred to on this page.
- https://www.miniand.com/wiki/Allwinner/Unpacking+and+building+LiveSuit+images
- http://forum.xda-developers.com/showthread.php?t=443994
- http://forum.xda-developers.com/showthread.php?t=1877807
1. Split image file into kernel and ramdisk parts
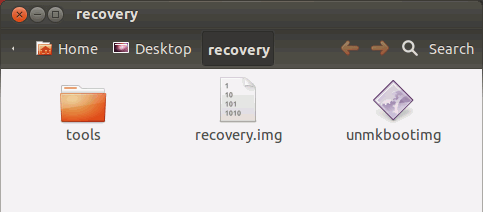
We start with the recovery image file (recovery.img) from Uberizer's changer_files directory. On the Linux machine, make a folder on the desktop (I called mine "recovery") and copy recovery.img into it.
Now get hold of some tools. First, download Linux image tools to this folder. This contains a set of tools for extracting and building images. It is described on this page. Extract it. Next, download unmkbootimg.gz. It's described on this page. Extract it as well. Delete the original .gz archives, we don't need them. Your folder should now look like:
We can now use either split_bootimg.pl (in the tools folder) or unmkbootimg to split up the image into the kernel and ramdisk. Both produce exactly the same results (with different filenames), but unmkbootimg is slightly more useful because it works out the base address to use when reassembling the image, and shows exactly what command to use. We'll use it.
Open up a terminal and navigate to the directory on the desktop:
cd /home/lindsay/Desktop/recovery
(or whatever you called yours). Next run unmkbootimg:
./unmkbootimg recovery.img > output.txt
(You may have to go into the permissions for unmkbootimg (right click, properties, permissions) and tick "Allow executing file as program"). The "./" is required since we're in the same directory as unmkbootimg. The output from umkbootimg is piped into the file output.txt, so you can copy the command used to reassemble the image later. Here's the output from the unmkbootimg command:
Kernel size 8617380
Kernel address 0x40008000
Ramdisk size 1963342
Ramdisk address 0x41000000
Secondary size 0
Secondary address 0x40f00000
Kernel tags address 0x40000100
Flash page size 2048
Board name is ""
Command line "console=ttyS0,115200 rw init=/init loglevel=8"
This image is built using standard mkbootimg
Extracting kernel to file zImage ...
Extracting root filesystem to file initramfs.cpio.gz ...
All done.
---------------
To recompile this image, use:
  mkbootimg --kernel zImage --ramdisk initramfs.cpio.gz --base 0x40000000 --cmdline 'console=ttyS0,115200 rw init=/init loglevel=8' -o new_boot.img
---------------
The directory will now look like this:
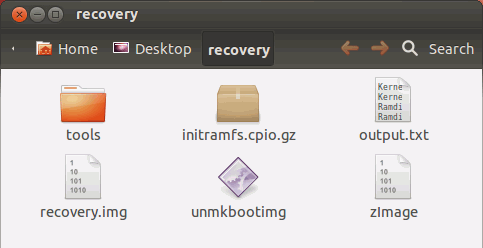
The kernel is zImage and the ramdisk is initramfs.cpio.gz. Have a look at the files sizes:
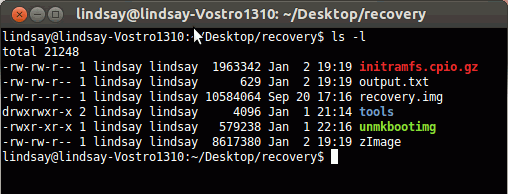
See how the file sizes match those specified in the output of unmkbootimg.
2. Decompress ramdisk into real files
The ramdisk format is a bit odd. The files have first been concatenated into an archive using cpio (this means the files are all strung together into one single big file, but not compressed), then compressed using gzip. So, to undo all this, we need to first gunzip the ramdisk and then use cpio to extract the files from the archive. This is mentioned, for example, here.
So, make a new directory called ramdisk. cd into it. Then use a combination of gunzip and cpio to extract the initramfs.cpio.gz file. Here's the commands:
mkdir ramdisk
cd ramdisk
gunzip -c ../initramfs.cpio.gz | cpio -i
The -c switch on gunzip makes it send its output to the standard output (i.e. the terminal). This is then piped (the | symbol) to cpio. The -i switch with cpio makes it work in copy-in mode - it copies files in from an archive, and outputs them as real files. Now have a look at the contents of the ramdisk directory:
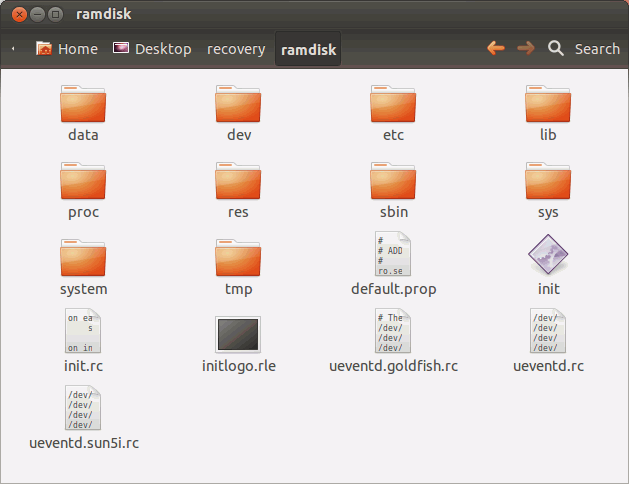
This is where all the interesting stuff is.
3. (Optional) make any alterations to the files
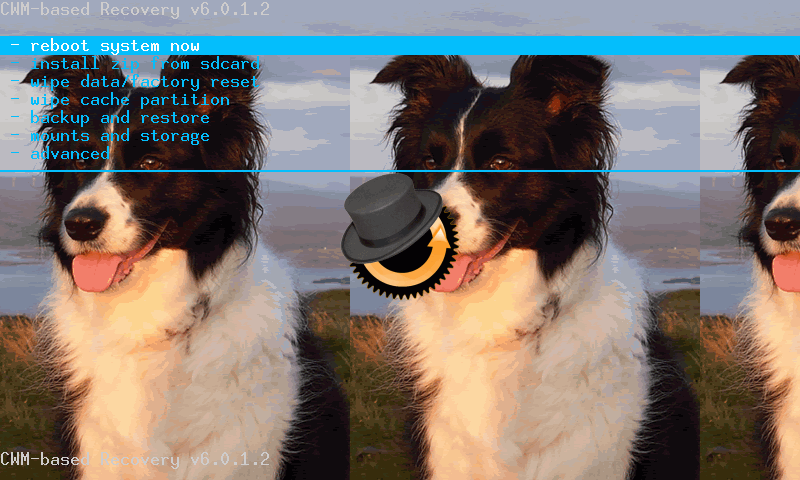
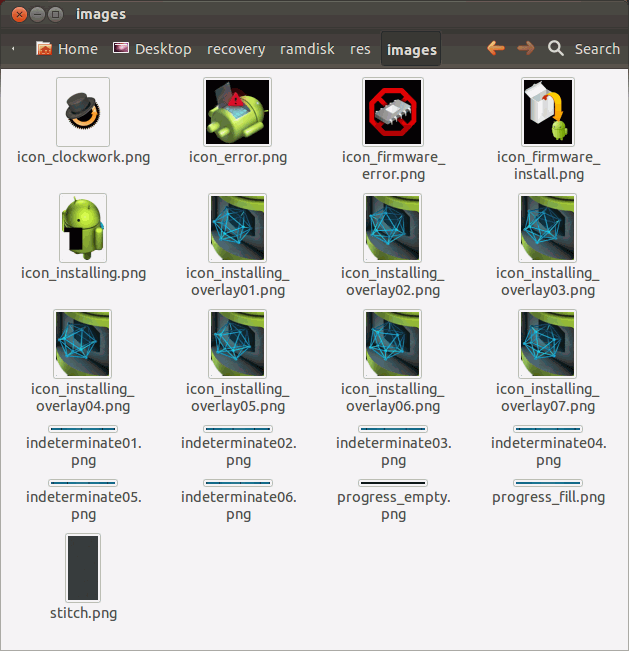
I was originally interested in replacing the background image with one of my own. The images used in CWM are located in res/images - see below.
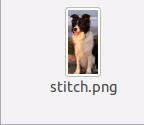
The background image is called stitch.png and is a 350x735 pixel, 72dpi, 24-bit PNG image. I simply overwrite this with an image of my own, of the same dimensions and format:
4. Compress the files back into a ramdisk
This is where confusion arose. According to the Miniand website, I should use the mkbootfs tool inside the tools directory, along with gzip, to turn the files inside the ramdisk directory back into a proper ramdisk image. The command would be (executed from within the recovery directory):
tools/mkbootfs ramdisk | gzip > ramdisk-new.gz
However, when carried through to completion, this does not result in a bootable image. I don't know what mkbootfs does, but it seems irrelevant - why not just reverse the action of gunzip and cpio to get back to a ramdisk file? In fact, this is exactly what's described here. While still in the ramdisk directory, run the following:
find . | cpio -o -H newc | gzip > ../newramdisk.cpio.gz
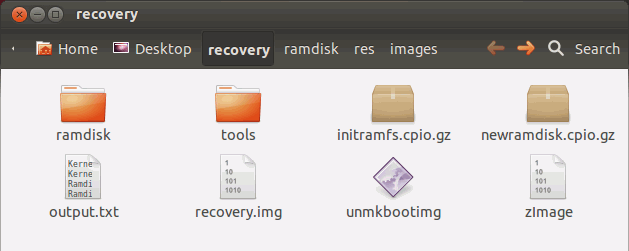
This consists of three parts. find . spits out (to the terminal) a list of all filenames in the current (ramdisk) directory, including files in sub-directories. This is piped to cpio. It uses the switches -o for copy-out mode, so it combines files from find . into an archive, and -H newc to specify the output format. This is then piped to gzip which compresses the output from cpio into a final, new ramdisk file, called newramdisk.cpio.gz. Here's the resulting files in the recovery directory now:
(If you're interested, compare the file sizes of the ramdisk files produced by mkbootfs and the other command - they are different, which probably explains why the final image doesn't boot. On mine, mkbootfs produced a file 2035130 bytes in size, while the find . | cpio -o -H newc | gzip > ../newramdisk.cpio.gz command produced 2033625 bytes.)
5. Combine new ramdisk with original kernel to form bootable image
If you're still awake, we now need to recombine the kernel and ramdisk back into a bootable image (exactly the reverse of splitting them up in step 1). To do this, we use the mkbootimg tool in the tools directory. Remember the output from unmkbootimg in step 1? It specified the format of the mkbootimg command to use. First cd back up to the recovery directory, then execute the command as below.
cd ..
tools/mkbootimg --kernel zImage --ramdisk newramdisk.cpio.gz --base 0x40000000 --cmdline 'console=ttyS0,115200 rw init=/init loglevel=8' -o new_recovery.img
The output from this is a file new_recovery.img which is the new bootable recovery image (you hope!).
6. Flash to device and test
This is flashed in the same way as the recovery image is normally (see elsewhere). Copy the new_recovery.img into the Uberizer program directory on your Windows machine (or wherever ADB is run from). Boot up the tablet into Android and connect it via USB. Open a DOS command prompt and run the following:
cd c:\Program Files\TechKnow\Uberizer
adb devices
adb push new_recovery.img /sdcard/
adb shell "cat /sdcard/new_recovery.img > /dev/block/nandg"
This first pushes new_recovery.img to the internal sdcard of the tablet (/sdcard/), then uses cat to write the entire contents of the image file to /dev/block/nandg, which is the recovery partition on the tablet.
To check it works, shut down the tablet manually. Wait 20s or so to make sure it's shut down. Boot into recovery mode by pressing & holding Vol +, and then pressing & holding Power until the screen lights up. Hopefully this will now boot into CWM recovery with a modified background image, like this: