
| ▲ Vacuum |
In vacuum systems, frequent use is made of glass to metal seals for things like electrical feedthroughs, viewports etc. Normally, if you want to seal metal to glass, the expansion coefficients must be matched closely to avoid stresses being built up upon cooling the formed joint. Nowadays, this isn't really a problem, since there is a wide range of alloys which are perfectly matched to different types of glass. For example, "Kovar" (iron, nickel, cobalt) is a close match to borosilicate glass (CTE around 3-4 ppm per °K), and "52 Alloy" (iron, nickel) is a close match to soda-lime glass (CTE around 9-10 ppm per °K). However, getting hold of small quantities of these alloys is difficult, even more so for forms other than wire which is relatively common for pin feedthroughs.
Wouldn't it be great if we could just seal glass directly to something like copper pipe, which is easily available? As it turns out, this is in fact perfectly possible. A technique was invented back in the 1920s by William Houskeeper (not Housekeeper, note!) to achieve this, because in those days glass sealing alloys were not available.
Unfortunately, while Houskeeper seals were used widely (even in commercial valves) it appears that, once proper sealing alloys came along, their popularity seems to have declined. I could not find any detailed description (that actually worked!) of the process. Joining glass to metal would be a great thing for the amateur vacuum scientist, so I decided to try and resurrect this antique process and determine just how to do it. After a bit of hair-tearing, I managed to get it to work, so read on!
A seal involving copper and soda-lime glass is the easiest to make because of the wide availability of copper and soda-lime glass, the ease of melting soda-lime glass with a propane flame, the good adhesion of soda-lime glass to copper oxide, and finally the high ductility of soft copper. Other seals are possible (e.g., stainless steel to Pyrex™) but are probably much more difficult.
Copper has a CTE of about 17 ppm per °K, while soda-lime glass is around 9. Therefore, trying to seal glass to a thick piece of copper is impossible. Upon cooling, the copper contracts far more than the glass and breaks the joint. To avoid this problem, Houskeeper used an extremely thin piece of copper. The thinness of the copper allowed it to stretch plastically as the joint cooled, allowing it to remain attached to the glass. In short, the strength of the glass-metal joint is greater than the yield stress of the copper itself.
It is possible, therefore, to seal thin foils of copper into glass tubes. It's very difficult in practice, because the copper tends to melt easily from the flame, or over-oxidise. To do this trick with tube, one end of the tube is turned to a tapered feather edge and the glass sealed to the thin edge. On cooling, the copper is stretched circumferentially by the glass, but stays attached.
There are various combinations of whether the glass should be sealed to the outside, the inside, or both surfaces of the copper tube. Despite the possibilities, I'm only going to consider external seals (glass sealed to the outside of the copper) here because they are much easier to make.
I managed to find six papers and patents of interest (see below). Note that all are rather ancient!
Houskeeper 1923 This is the original, lengthy paper in which he describes a wide range of seals. Not too good on constructional technique.
USP1293441 Houskeeper patent #1
USP1294266 Houskeeper patent #2
Skinner 1930 Copper to pyrex tubular seals
Laszlo 1933 Small-diameter copper/glass seals
Benbenek 1960 Stainless steel to #7052 glass (borosilicate)
Lastly, this site describes the dimensions of the feather edge, which I didn't find in any of the papers: http://www.r-type.org/static/glas-met.htm. A PDF of that page is available here.
The edge of the copper tube to which the glass is sealed must be machined to an extremely thin feather edge. This ensures the copper can be stretched by the glass upon cooling. The edge should be around 40μm thick, tapering back at a 2.5° angle to a maximum of about 1mm thickness.
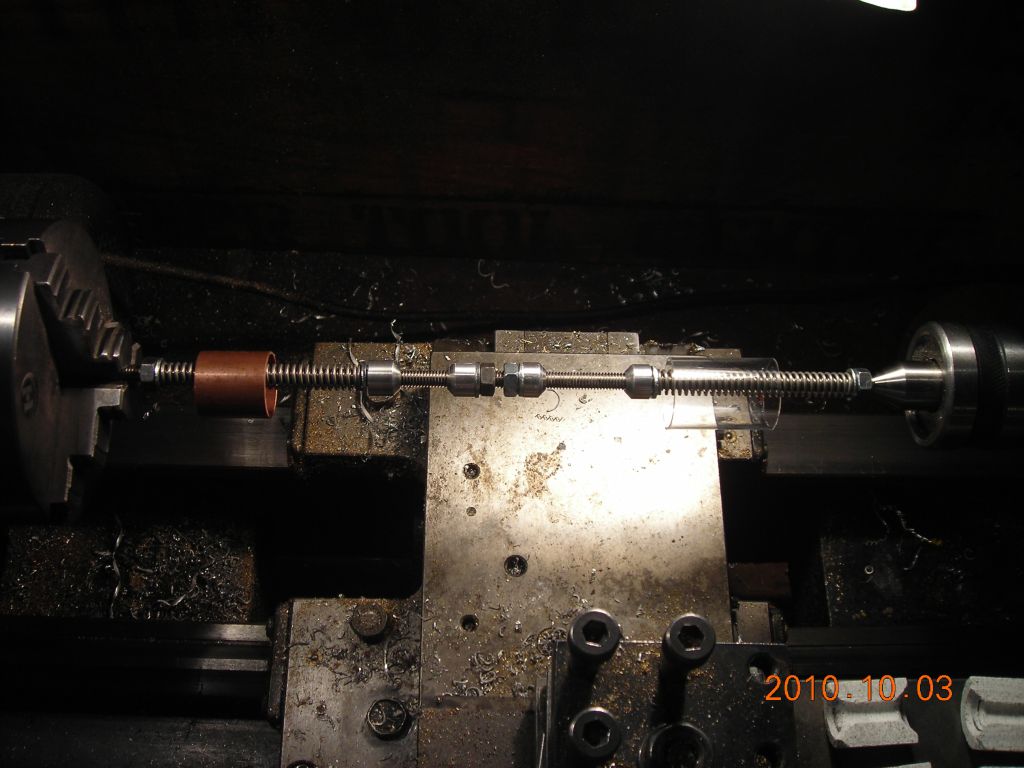
As luck would have it, 22mm diameter copper tube (a standard plumbing size) combines nicely with 24mm diameter test tubes. The tube is first bored out to get a smooth internal diameter and an expanding plug inserted & tightened to allow the outside to be turned without the wall collapsing. The outside is polished with fine sandpaper to get a smooth finish.
Although copper is pretty hellish stuff to machine, it's quite nice if you have the right tool. It's important to have an extremely sharp knife-edge tool, with lots of rake and clearance. Cutting fluid is a must. Take light cuts, around 0.05mm.
 Dimensions of copper pipe and taper |
 Copper tube mounted in lathe and bored out to take plug |
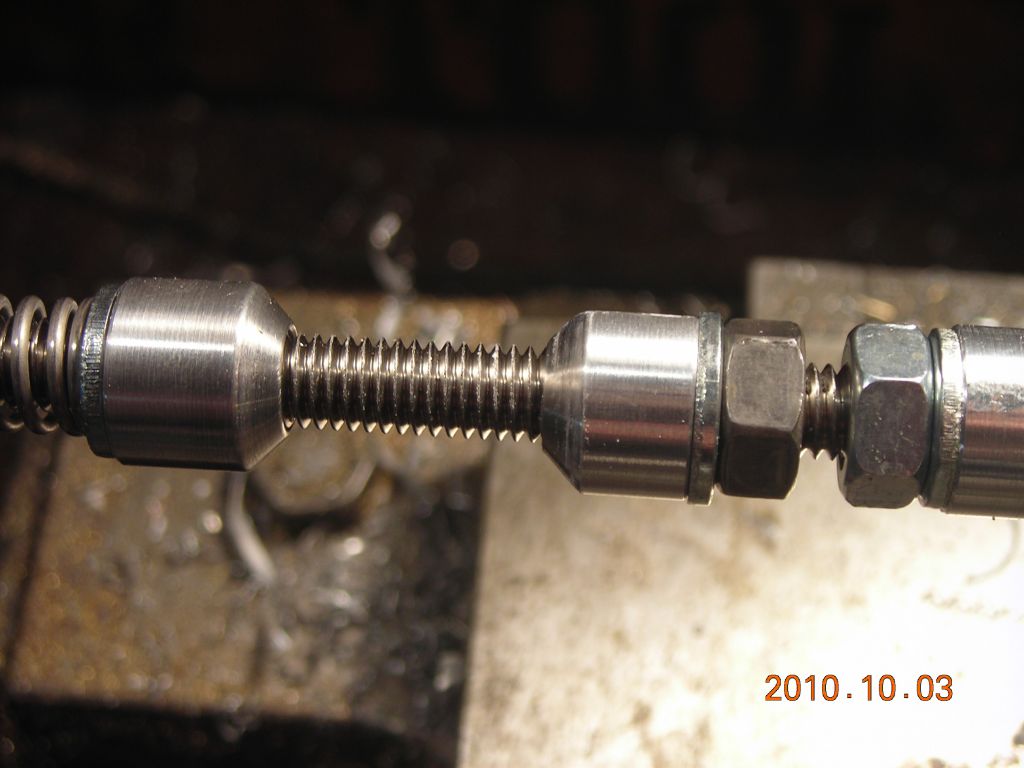
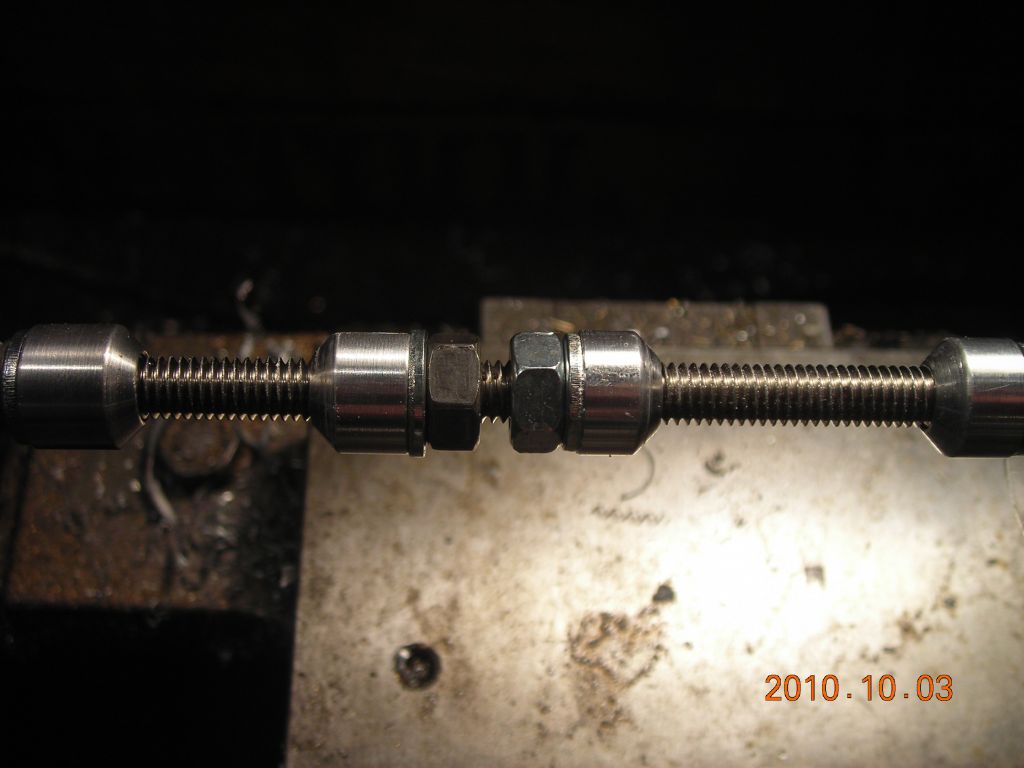
 Expanding plug |
 Plug inserted in pipe and tightened |
 Outside machined to a taper |
 Plug removed, showing the feather edge |
I found it was sometimes necessary to lightly sand the feather edge on some 1200 grit paper to remove the very small burr left from machining the outside taper. Be careful not to dent the edge while doing this.
After machining, the tube is washed with hot water and detergent and dried with kitchen paper. Avoid touching the edge with your fingers, since this leaves a grease mark.
The first box of test tubes I came to said "soda glass" so I started using them. As it transpired, these were in fact borosilicate glass! In my attempts to melt the glass I overheated the copper and the glass and ended up with a horrible bubbly seal. Despite this, the glass stayed attached to the copper and didn't crack (admittedly, it did pull off the copper later, but that was hardly surprising given the low contact area of the seal).
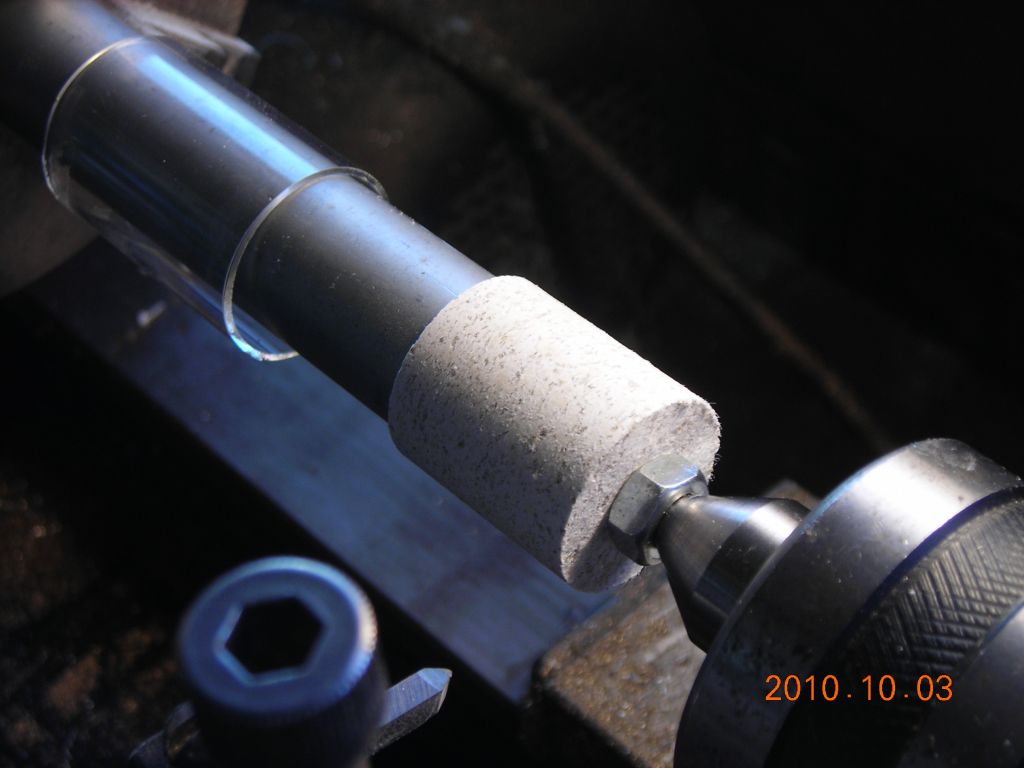
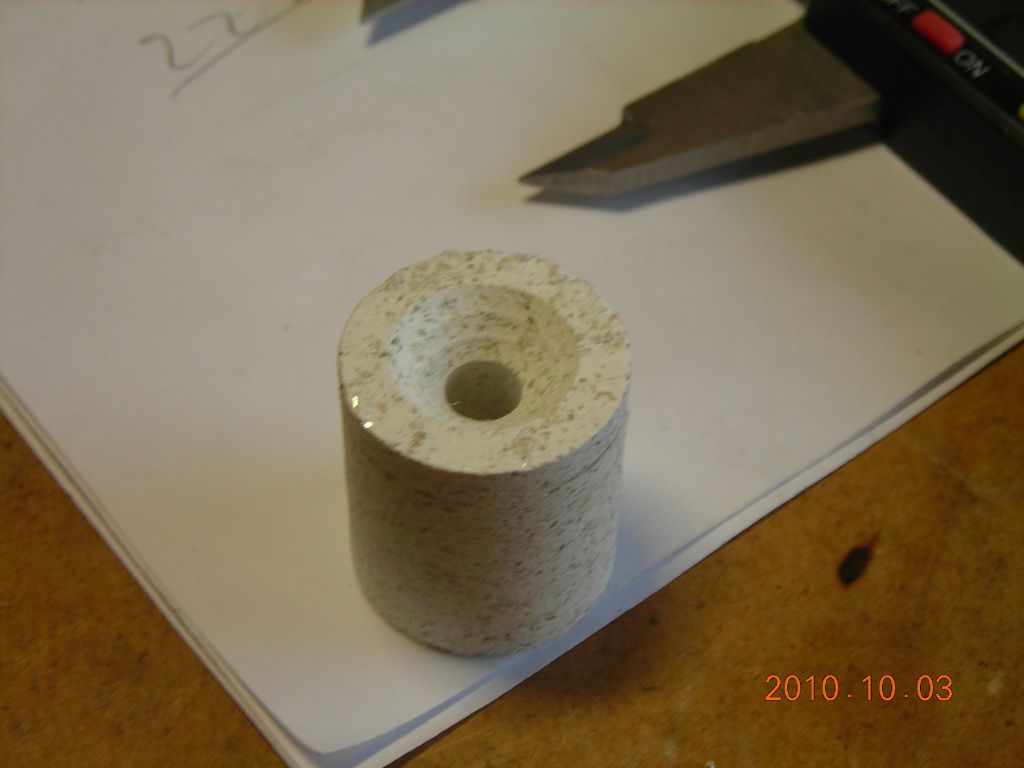
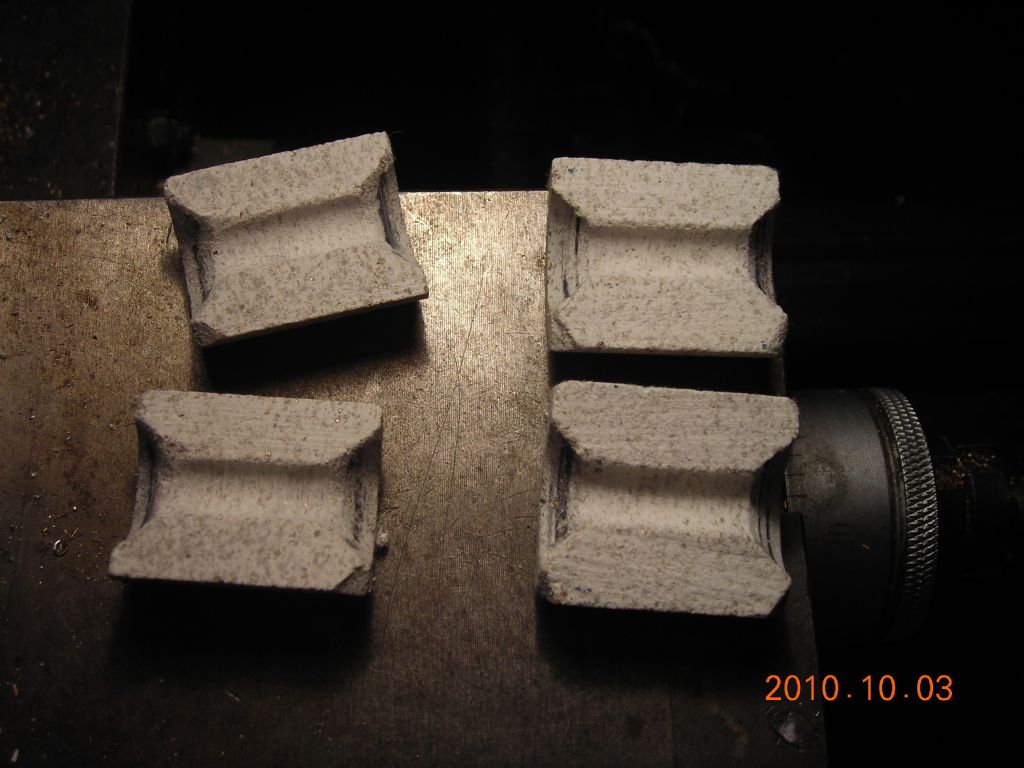
The copper tube and glass tube are held on cylindrical insulating spacers on a metal rod held in the lathe chuck. The insulating spacers were turned from chunks of a firebrick-like material which is used for soldering bits of jewellery on (available from HS Walsh among others). It's a very soft, fibrous board which can easily be machined to shape (but is asbestos-free).
I used an oxy-propane torch to heat the glass and a graphite rod to press it down on to the copper. After making the seal, the joint is cooled by heating with a sooty flame and is then wrapped in glass wool and allowed to cool gradually to room temperature.
The copper is left with a thick, flaky layer of oxide on its surface. To clean it, I found that a 10% suplhuric acid pickle worked nicely. The copper is left in for 10 minutes or so and this loosens all the oxide on the surface which can then be brushed off under running water. The copper surface is nice and bright, if a little bit pitted from where the oxide was.
 Some examples of glass tubing cut on the lathe by the "scratch & heat" method |
 Spacers mounted on metal rod |
 Copper and glass tubing in place |
 Completed joint |
 |
 |
 |
All papers talk about coating the edge of the copper with a layer of copper borate. It's not entirely obvious why this is done, but it appears to be an attempt to prevent the copper over-oxidising during the sealing process. Despite a lot of experimenting, I couldn't find a satisfactory way of borating the copper, so I decided to avoid it altogether. I'll mention what I found out anyway.
Two of the papers (Skinner30 and Laszlo33) describe applying an aqueous solution of borax to a slightly oxidised copper surface. One says to use a saturated solution, the other a dilute solution, so that confused me for a start. I decided to stick with a saturated solution. However, it is impossible to get a nice uniform coating of any thin, aqueous solution on a metal surface. As soon as it's applied, the liquid "balls up" and leaves uncovered patches.
I eventually discovered that borax is very soluble in methanol (around 20% w/w compared with only 5% w/w in water). In addition, the methanol wetted the surface nicely and ensured a nice uniform coating. I was able to dip the end of the copper tube in the solution, withdraw it and let the methanol evaporate to leave a thin layer of borax. Great, I thought. However, on heating, the borax fluffed up and revealed exposed areas before it melted. This occurs because borax is normally bought as the pentahydrate and it loses its water upon heating. In short, it is impossible to achieve a smooth glazed layer of borax if the pentahydrate is used, even if it's applied smoothly intially. This is at odds with what both of those papers say.
The next attempt was to use dehydrated borax. The only way to make this (short of buying it, which is difficult) is to melt the pentahydrate, cool it and grind it up. Simply heating in an oven won't do. I eventually managed to do this and obtained a small amount of dehydrated borax powder. This, when mixed with methanol as a carrier (it doesn't dissolve) and spread on a copper surface, did result in a nice smooth glaze with no fluffing up problems and showed the distinctive purple/reddish colour of copper borate near the edges of the blob.
Borax, which is sodium borate, decomposes on heating to sodium metaborate and boron oxide. The boron oxide dissolves any metal oxides present, such as copper oxide, to form the metal metaborate. This mixes with the sodium metaborate and is carried away from the metal surface, leaving fresh boron oxide to reach it. Therefore, if there is plenty of borax present on the surface, there is a high probability that it will dissolve all of the copper oxide from the surface and leave bare copper. This is no good for glass sealing, since the glass must wet a thin layer of the oxide. This would then suggest that it is important to get a very thin layer of borate on the surface, which is very difficult to do. That apart, it turns out that most metaborates are water-soluble. When I came back the next day to my little samples of copper coated with the borax glaze, they had all turned white on the surface from water vapour in the air! If I had sealed glass to the borate, how is that going to stand up in the long term as water gradually attacks the borate layer? Yes, maybe the borate dissolves completely in the glass, but how do you ensure that?
At this point, I was thoroughly put off the whole business of borating, so I decided to step back and look at the overall picture! No other glass-metal sealing technique uses borating. If over-oxidiation is likely to be a problem, metal surfaces are usually pre-glassed with the same glass as the main sealing glass. That way, a suitable layer of oxide can be formed and protected with a thin layer of actual glass. I decided to have a shot at this.
My initial attempts involved heating the copper red-hot with the torch and dipping it into a jar of glass powder. The glass powder I used was Bullseye powder frit (transparent, clear) from Creative Glass Guild. This worked surprisingly well and I was able to build up a nice layer of glass on the surface. It was a bit hard to limit the area covered by the glass. The first three photos below show the results on clean copper surfaces. Note the nice red colour of copper oxide under the glass - the copper probably oxidised sufficiently before I dipped it into the glass for the first time. I tried sealing a glass tube to the edge, but it didn't go well since I was still using the borosilicate glass by mistake.
 Glass applied to some copper disc samples |
 Glass on end of tubes |
 Note internal coating as well |
 Failed attempt at joining to borosilicate glass - not surprising! |
I later discovered a far better way of applying glass to the edge of the copper. There is an amazing glue called Glastac, made by Bullseye and available from many glass fusing suppliers (mine was from Creative Glass Guild). It's probably based on cellulose gum and burns off cleanly during firing without leaving any residue. The glass powder is mixed up to a paste consistency with the Glastac and is brushed on to the edge of the tube (see below). Once dry, it can then be fired using the torch to obtain a nice uniform glass bead on the edge of the copper.
 Glass powder applied to edge |
 After firing |
The Glastac method is probably the best for pre-glassing the edge. Fortunately, however, I discovered that it isn't actually essential to have a pre-glassed edge, so long as the seal is done relatively quickly.
For the first seal, I though I would try sealing the glass to clean copper directly without bothering with any pre-oxidation of the surface. I knew this was unlikely to give a strong seal, but I was interested to see just how much oxide formed during the process.
As it turned out, quite a good seal was achieved! As you can see from the pictures below, there was the beginning of a nice red layer formed underneath the glass, but it didn't extend very far and a lot of the copper surface was left bare. This is very encouraging, since it suggests that the copper does not over-oxidise during the sealing process. Next time, I'll try pre-oxidising the copper to see if a more uniform seal can be made.
Note how the glass tube has buckled near the join - this was a result of the poor holding arrangement. The glass and copper tubes are relatively loose on the insulating spacers, so when I tried to push the glass tube towards the copper I managed to deform the edge. Clearly, a better way of holding the tubing is needed.
 Tubes mounted on lathe |
 Completed seal - note limited extent of the oxide layer |
 Quite a lot of bare copper showing |
 |
 |
I made two split plugs from the insulating soldering block material and arranged them on an M6 threaded rod in the lathe so that they can be expanded using 45° cone washers mounted on the threaded rod. Springs are used to keep up the force even when the tubing expands. The end result is that both tubes are held concentrtically and tightly and can easily be manipulated to make the seal. The far end of the threaded rod is countersunk so it can be supported with the revolving center. Important note - do not tighten the revolving center, since the threaded rod expands considerably from heat during the sealing process and can jam the revolving center!
 Turning down a cylinder from insulating board |
 Finished spacer with 45° countersunk ends |
 Overall view of arbor |
 Closeup of the conical nuts |
 Another view showing both pairs of conical nuts |
 The split insulating bushes |
 Example of how the bush holds the glass tube. Pressure is applied via the spring on the right. |
 Copper and glass tubes mounted on arbor |
This time, I pre-oxidised the seal to the colour shown in the picture below. I simply heated the copper tube with the torch until the feather edge gradually turned that colour. Notice that it appears to be flaky - this didn't seem to be a problem, fortunately. The smoother the surface is, the less flaking occurs, so try and get a mirror finish on the copper beforehand. Also, when I was heating the copper tube to oxidise it, I slid the glass tube out of the way, both to protect it from the heat, and also to allow air to reach all parts of the feather edge of the copper tube. Once it was oxidised, the glass was slid back into place and the seal made.
As the glass was melting, I could clearly see where it was wetting the copper oxide surface. I pressed it against the copper using the graphite rod until all of the glass was adhered, then it was cooled in a sooty flame and wrapped in glass wool.
 Copper and glass tubes |
 Mounted on new arbor |
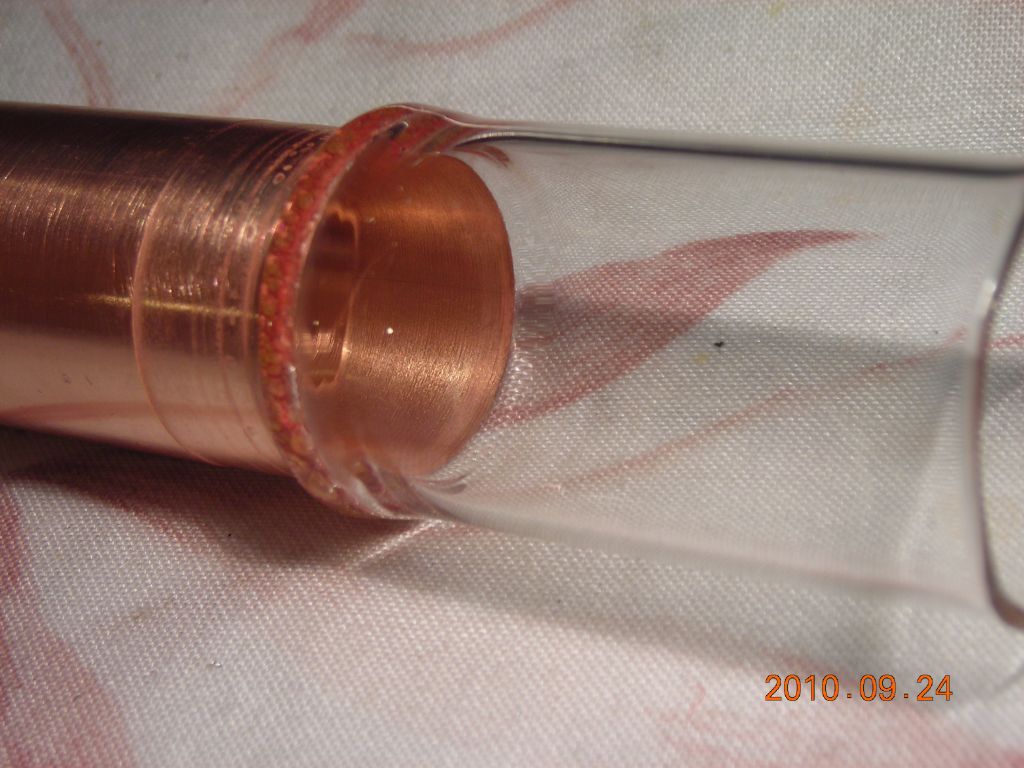
 Closeup of joint region |
 After pre-oxidation |
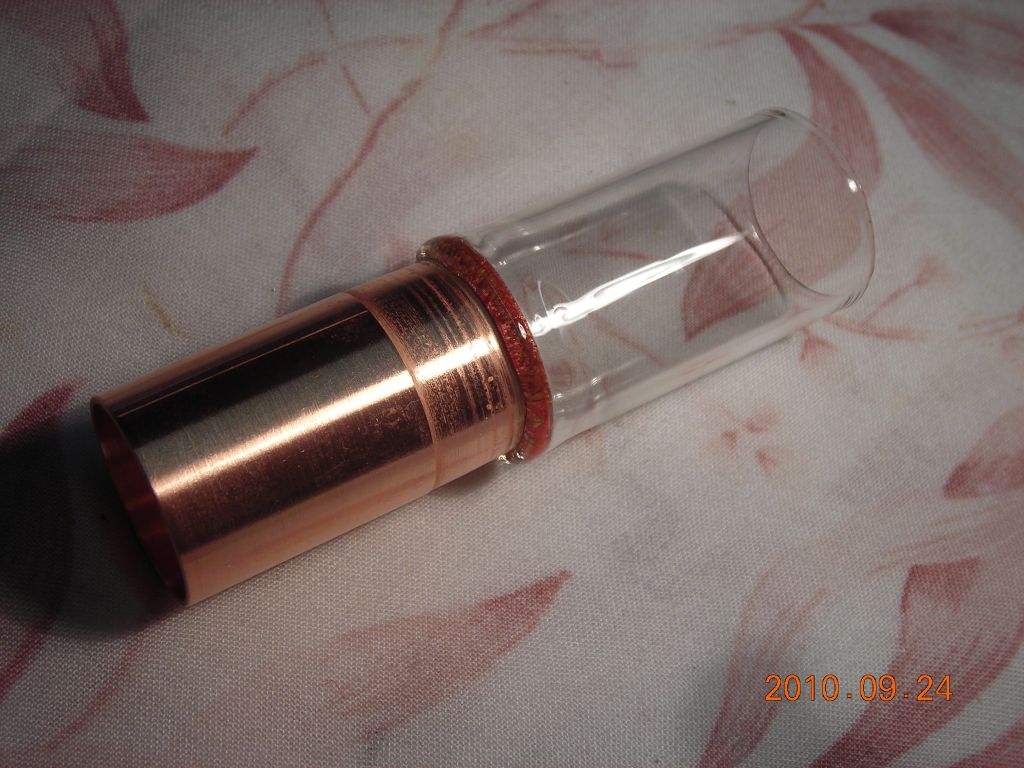
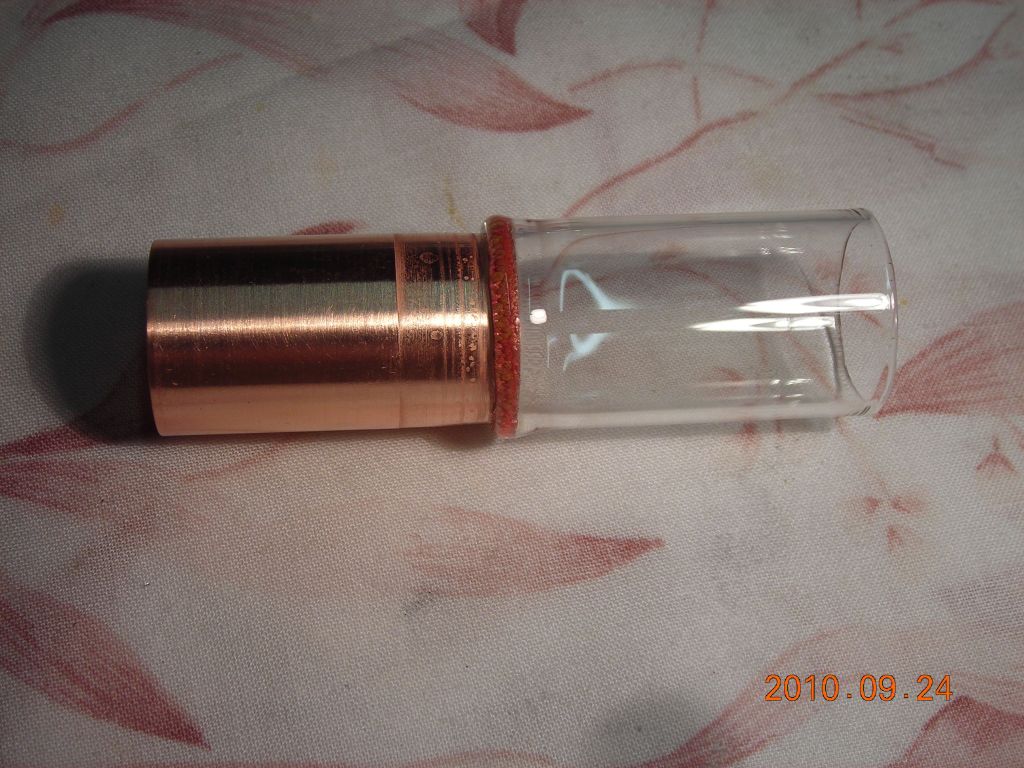
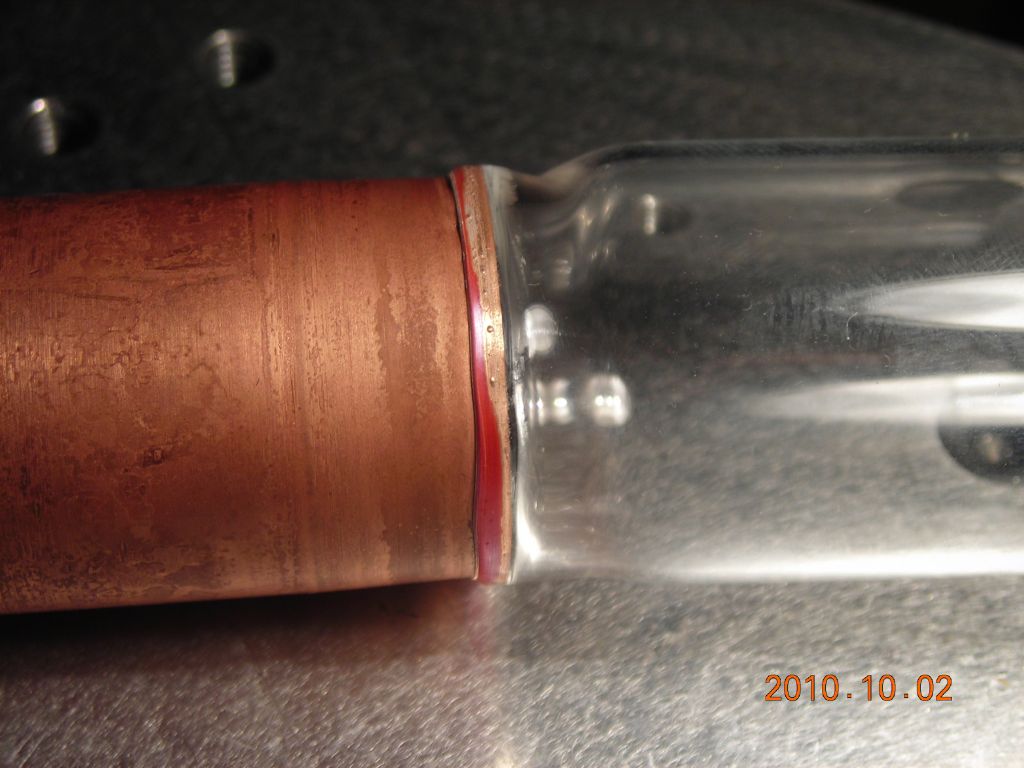
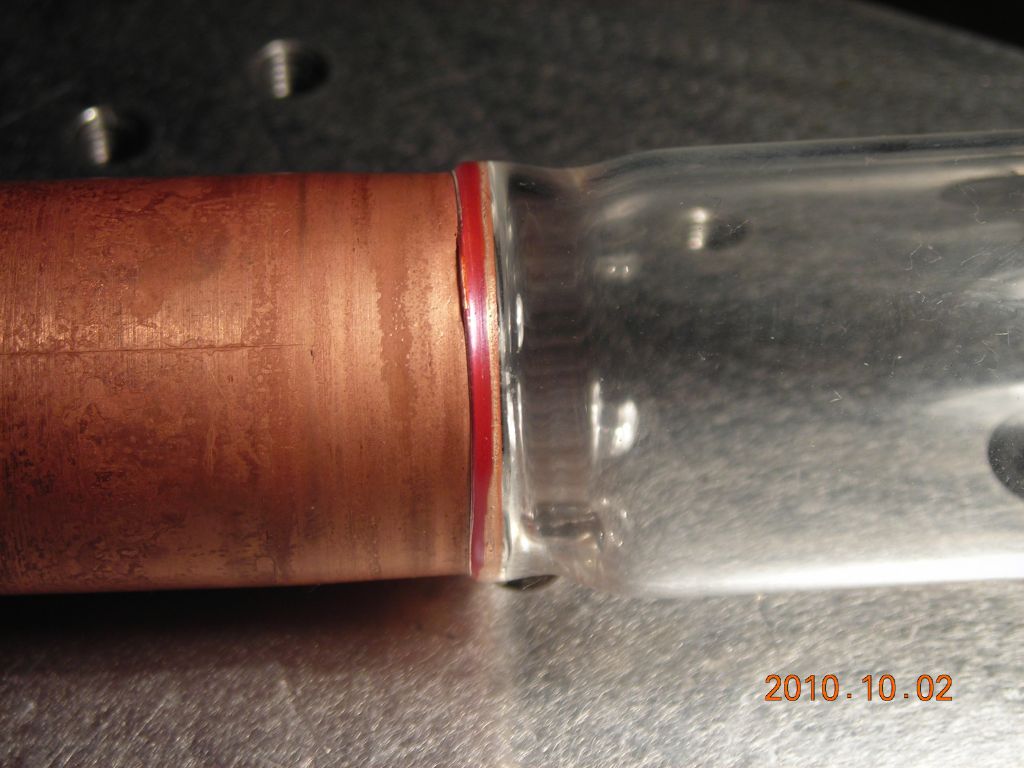
 Completed seal |
 Another view |
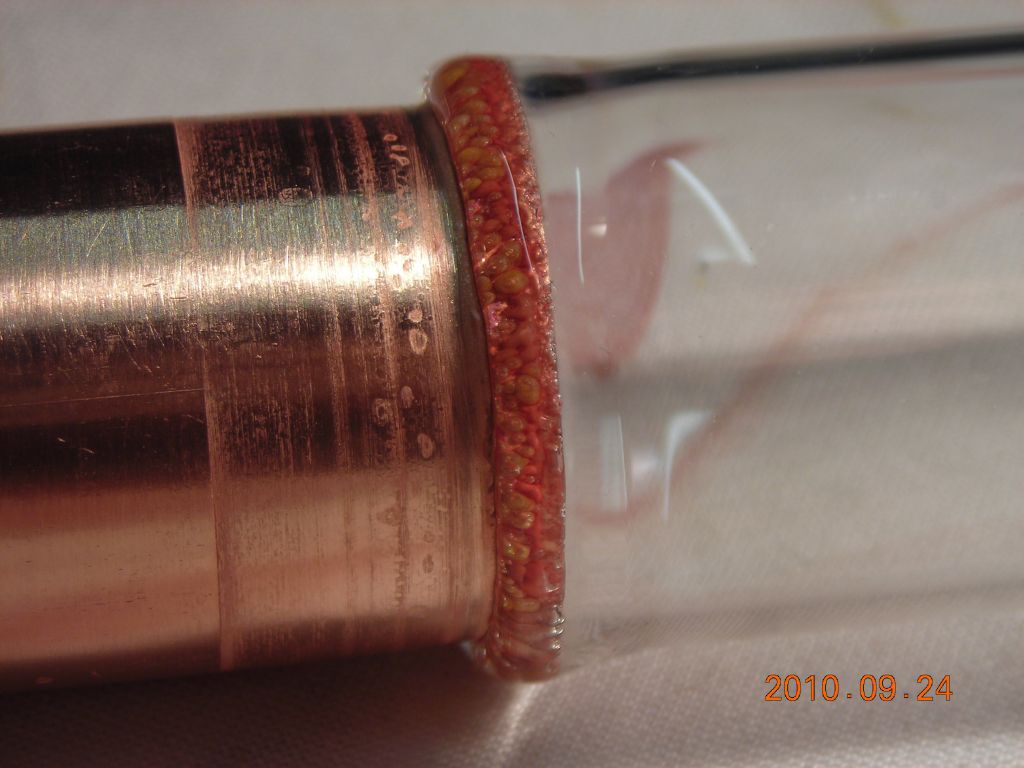
 Note the uniform colour and presence of small bubbles |
 Not a bad join though! |
This seal turned out very well. The colour is a uniform light pinkish/reddish, which indicates that there's probably just the right amount of oxide present. There are quite a lot of tiny bubbles in the seal but I don't think they will affect the integrity hugely. All in all, a success!
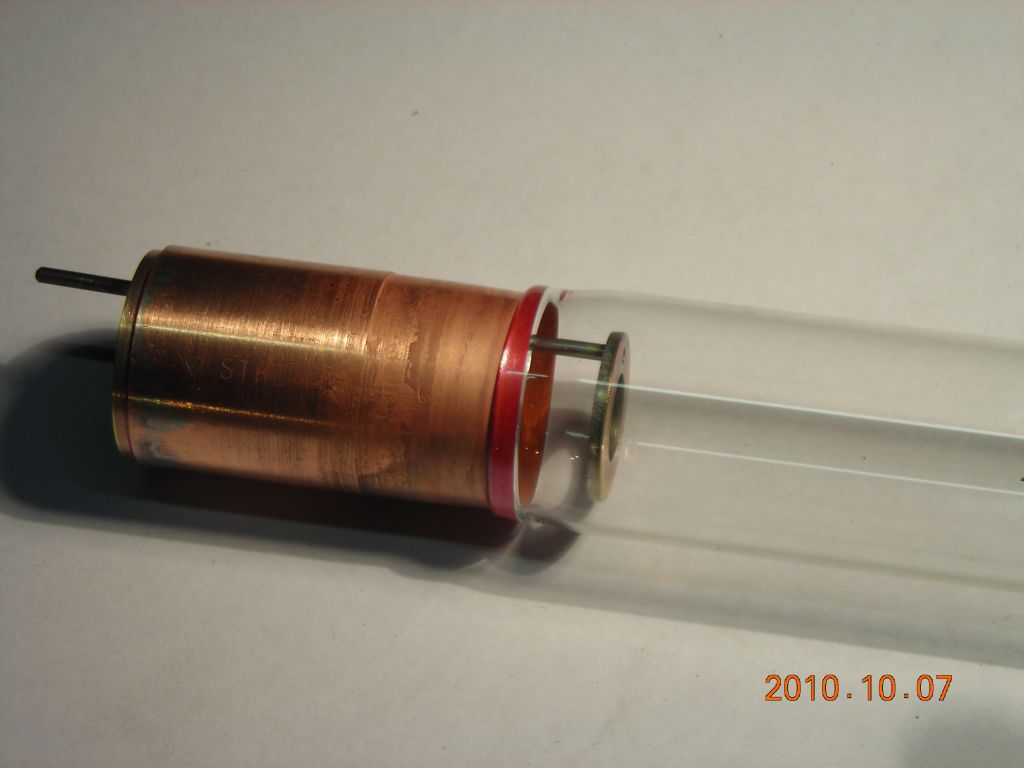
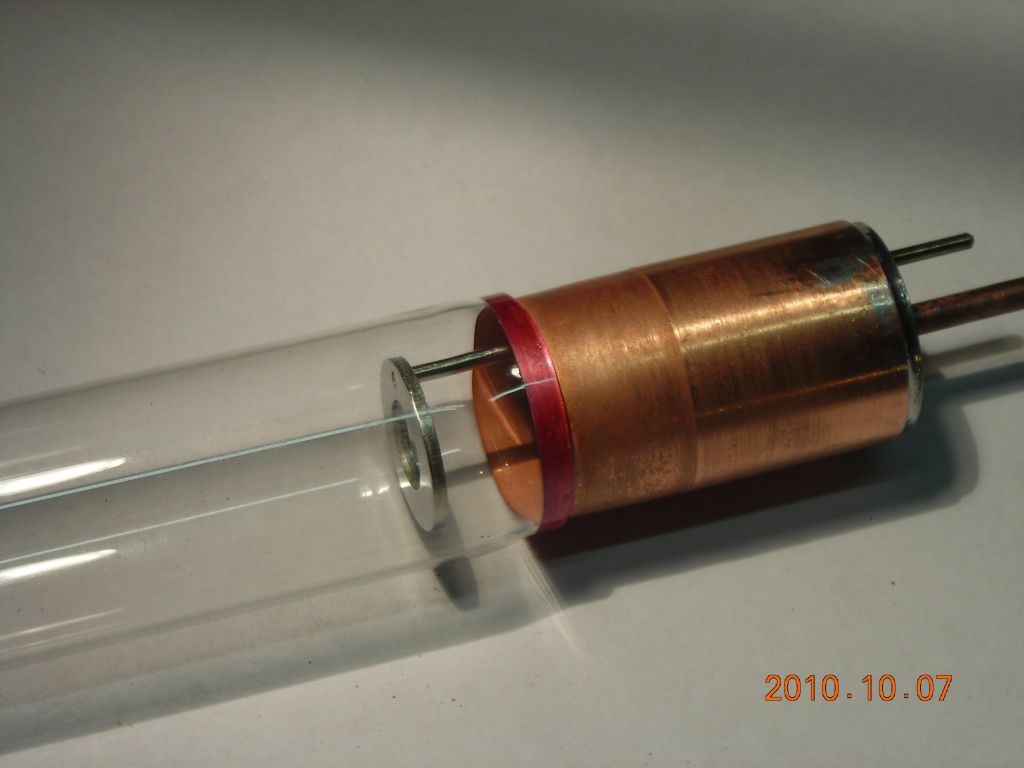
Just for fun, I made a little discharge tube using two Houskeeper seals to join copper electrodes to the ends of a glass tube. For these joins, I used a bit more pre-oxidation. The colour was a dark purple/black instead. This resulted in the final seal looking purple/red and also bubble-free, so this seems to be a good colour to settle for.
The electrodes are stainless steel washers mounted on the end of some stainless TIG filler wire. These are silver-soldered into brass end plates which are then soft-soldered to the copper tube ends of the discharge tube. Surprisingly, the Houskeeper seals seem unaffected by the soldering heat, although it would be far better to make the solder joints first (all with silver solder), clean thoroughly, and then do the Houskeeper seals. That would also allow the tube to be sealed off permanently - as it is, flux residue inside the tube would outgas and destroy the vacuum.
I tried using solder paste at one end to attach the brass plate to the copper tube, but it didn't flow well. For the other end, I used a combination of a small gas torch and a big soldering iron - the torch heated the whole area to just below the solder's melting point and I was then able to control the solder nicely with the iron.
It works really well and displays a nice discharge when connected up to my 40kV flyback supply. No significant heating is apparent and there doesn't seem to be any problems about a discharge from the copper tubing itself.
 Both copper ends |
 Making the first seal |
 This is the colour used for pre-oxidation |
 First seal |
 Closeup - no bubbles and a nice dark red colour |
 Both seals completed |
 Closeup |
 Closeup |
 Electrodes - wire press-fitted into washers |
 Electrodes and pumping tube soldered to end plates |
 |
 |
 Endplate in position for attaching to tube |
 Held in place with a nail |
 Solder paste applied |
 Completed tube |
 End 1 closeup |
 End 2 closeup |
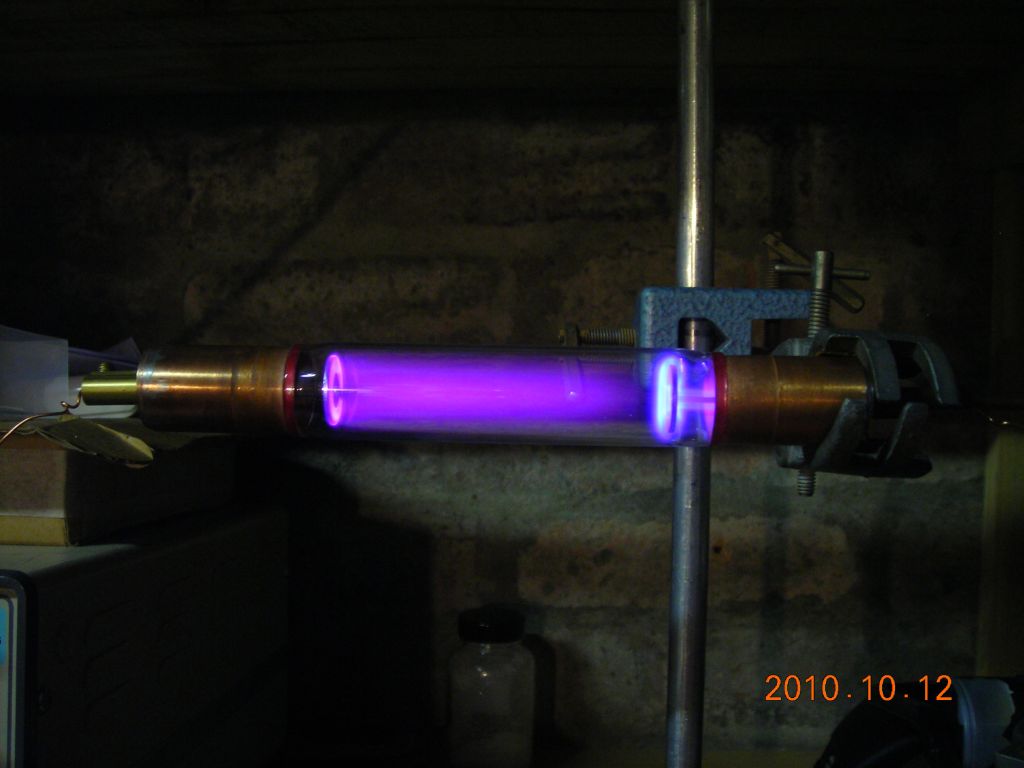 In operation |
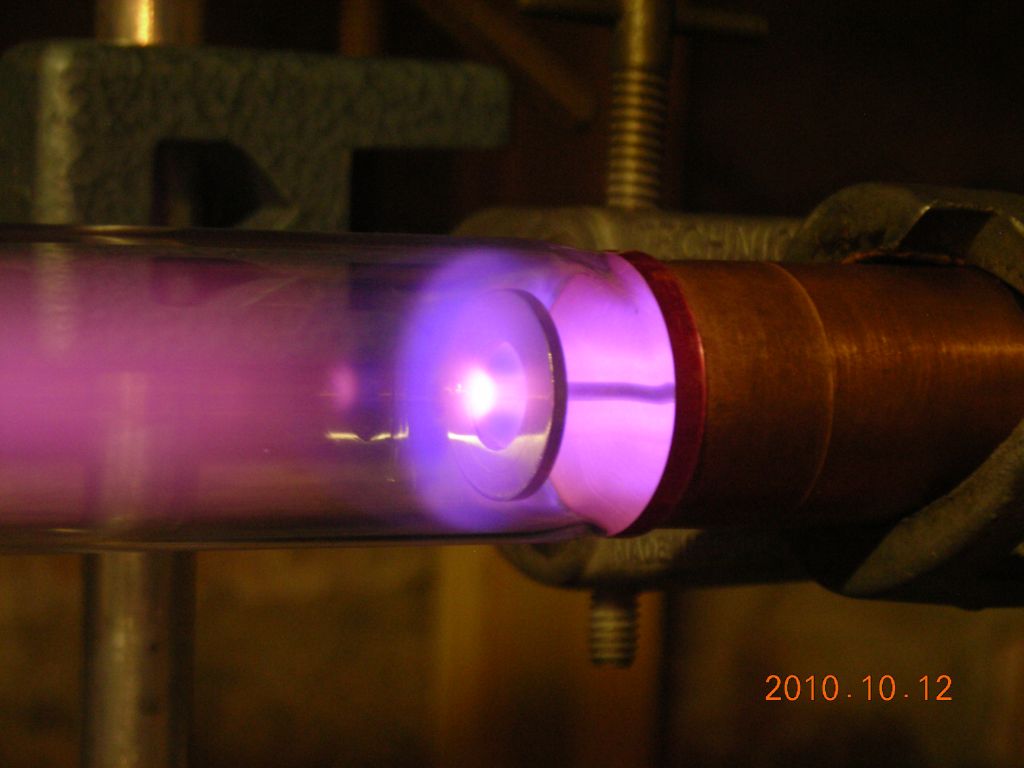 Closeup of cathode |
There you have it - a nice repeatable technique for joining metal to glass without any fancy alloys! They may not be as robust as "proper" glass-metal seals made from the likes of Kovar or the nickel alloys, but they are certainly far more suited to small-scale research. Anyone with a lathe should be able to produce them.
A big thanks to Jon Singer for his help in proofreading this and in helping with technical details!
While making another seal, I decided to make a video of the process - see below. It turned out pretty well - the most interesting bit is seeing the molten glass stick to the copper surface (from around 2:35 to 3:00 in the video).
| ▲ Vacuum |