Taking screenshots
There are several different ways of taking screenshots of the tablet, varying in their usefulness.
Android shortcut
Android 4.0 and above has a built-in shortcut for taking screenshots. Press the Vol - and Power buttons simultaneously; a PNG screenshot will be saved to the internal SD card in a folder called screenshots. Here it is (converted to a JPG):

Note that this does not work for taking screenshots when in CWM recovery mode.
/system/bin/screencap
See here.It's possible to call the built-in screenshot function over ADB by running the following commands:
adb shell /system/bin/screencap -p /sdcard/screenshot.png
adb pull /sdcard/screenshot.png screenshot.png
Make sure to use the -p switch and call the file with a .png extension, for safety's sake. Otherwise you seem to end up with a raw data file. This gives exactly the same results as the Vol - & Power button trick.
Again, this doesn't work for screenshots in CWM recovery mode, since the /system/bin/screencap binary isn't present when booted into recovery.
Framebuffer - Android
See both here and here. The LCD framebuffer is available by reding the device /dev/graphics/fb0. This supplies raw pixel data which can then be deciphered. To do this, run the following:
adb pull /dev/graphics/fb0 fb0.raw
This pulls the framebuffer data to a file called fb0.raw on the computer. For my tablet, the resulting file size is 3072000 bytes. It appears to contain two identical copies of the framebuffer, and data is stored in a 4-byte per pixel format. Byte order is BGRA (blue, green, red, alpha), with the alpha byte set to 0xFF for all pixels. Pixels start in the top-left corner of the screen and work along and down. I was able to determine the byte order by taking frambuffers of screens showing solid red, green, or blue colours, and screens showing a black image with a white bar at the top or at the left. For example, here are the first 16 bytes of the framebuffer when the tablet is showing all-red, green, and blue images:
Red: 	00 00 ff ff 00 00 ff ff 00 00 ff ff 00 00 ff ff
Green:	00 ff 00 ff 00 ff 00 ff 00 ff 00 ff 00 ff 00 ff
Blue:	ff 00 00 ff ff 00 00 ff ff 00 00 ff ff 00 00 ff
At a resolution of 800x480 pixels, that's a total of 1536000 bytes. Times 2 gives the total 3072000 file size.
There are two options for converting the raw data into a usable image. You can use Irfanview with the following import setings:

These settings are a slight fix, since Irfanview only supports ABGR byte order, so we skip the first 3 bytes of the file to get BGRA. The downside of this is a 1-pixel wide dead zone at the right of the image.
The second way is to use a little VB6 program I wrote. See here for details.
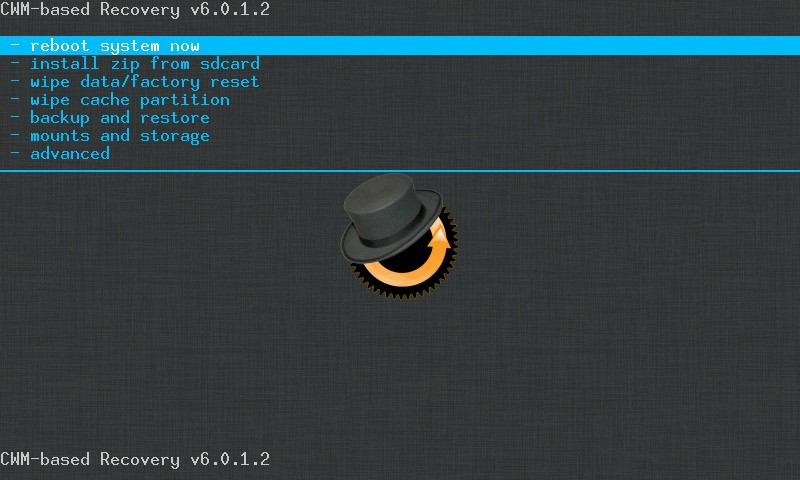
Framebuffer - CWM recovery
It's also possible to use exactly the same method to get the framebuffer when booted into CWM recovery mode. However, for some reason, the colour format is different. I eventually figure this out by making different CWM recovery images with different background images (see elsewhere for how to unpack and repack the CWM recovery image).
The format is RGB 5:6:5, which is a total of 2 bytes per pixel. Data is presented lower byte first. Here's a representation of how the bytes appear in the file (for one pixel). Numbers refer to the bits.

If we read in two bytes and call them lbyte and hbyte respectively, then we can calculate R,G,B values (0-255) from
r = hbyte And 248
g = (((hbyte * 256) + lbyte) And 2016) / 8
b = (lbyte And 31) * 8
Again, you can either use Irfanview or my own program to do this. This time Irfanview works properly (no need to skip 3 bytes like before). Use these settings:

The result: