
| ▲ Workshop |
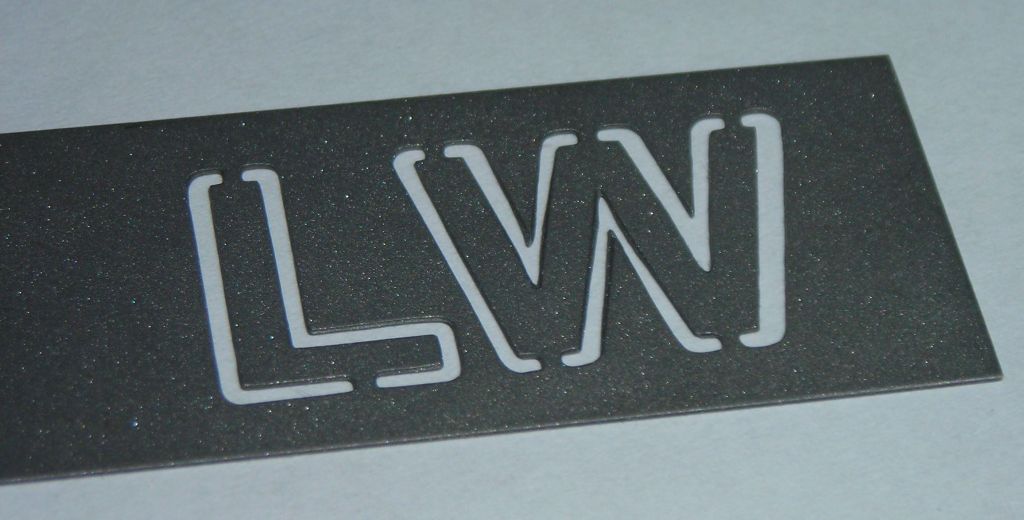
I originally started experimenting with this when I needed to make the cathodes for the little text discharge tube. These had to be made from thin (0.25mm) steel sheet, cut in the profile of letters. It turned out that electrolytic etching provided a great means of doing this. Later on I found that it is a good way of doing deep etches into steel and stainless steel. It requires very simple equipment, and I'll describe the process briefly here. There is plenty info on the web about this - I've just put some examples here of what I've done to give an idea of what's possible.
The idea is to make the thing you're etching the anode (positive) in a bath of electrolyte, with a piece of stainless steel as the cathode (negative). Passing a current causes the metal from the anode to dissolve into solution, etching away at the surface. I found that a salt solution (about 2 heaped teaspoons in 1L of water) worked pretty well. Currents were typically in the range 0.5-2A, resulting in etching times of around 20-30min. Power was from a variac + transformer + rectifier/smoother.
Steel and stainless steel worked best. With both, a black sludge forms over the area being etched, which makes it look like nothing is happening, but the etching continues underneath. The salt solution turns brown and cloudy with the black sludge, but this doesn't affect the etching. The sludge is iron and can safely be chucked away down the drain. Stainless-steel knife blades worked very well.
Copper didn't go as well, with a hard greyish layer forming over the etched area which prevented current flow. Probably down to the electrolyte - I guess for etching copper you need a copper sulphate electrolyte. However I'm not too bothered as I can already etch copper chemically with ferric chloride. It was just to see what happened.
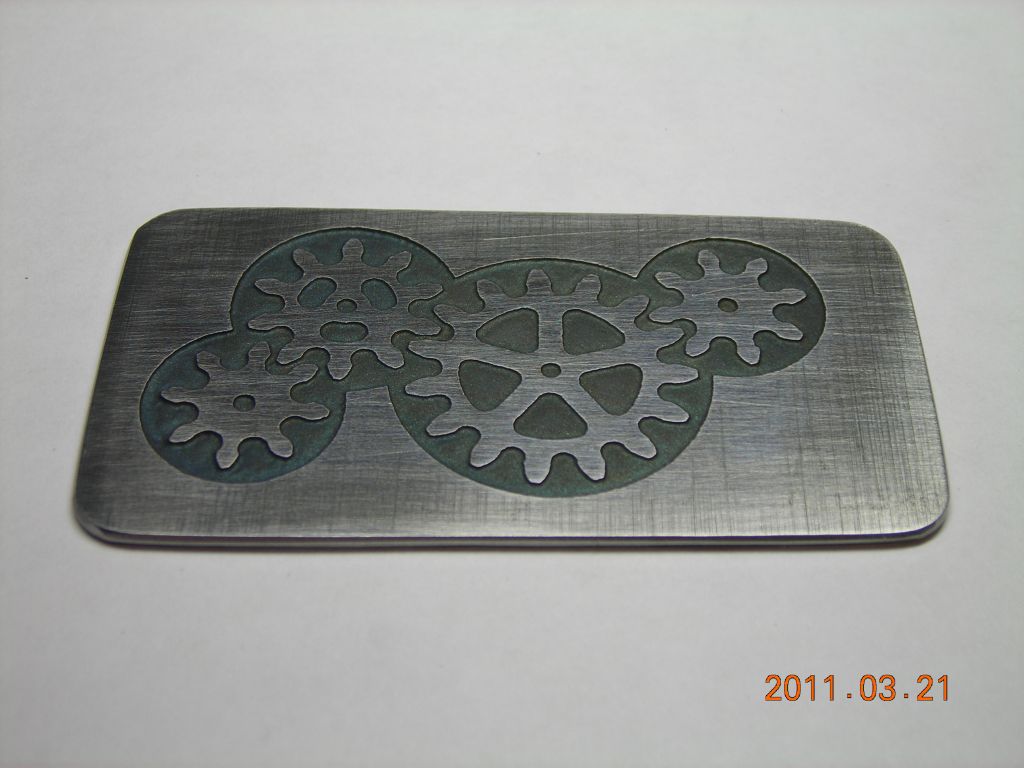
All of the examples below used a piece of PVC sign vinyl as a mask - this was laser-cut to form the desired pattern. After etching, the piece was given a light sandblasting to roughen up and clean the background with the mask still in place. This was especially important for the steel samples, since the black sludge is rather tenacious.
 Double-sided etching of 0.4mm spring steel sheet. Masks were aligned using the double-sided alignemnt jig. |
 Etching steel. Dimensions of piece are approx. 6x4cm. Background has been blued by heating. |
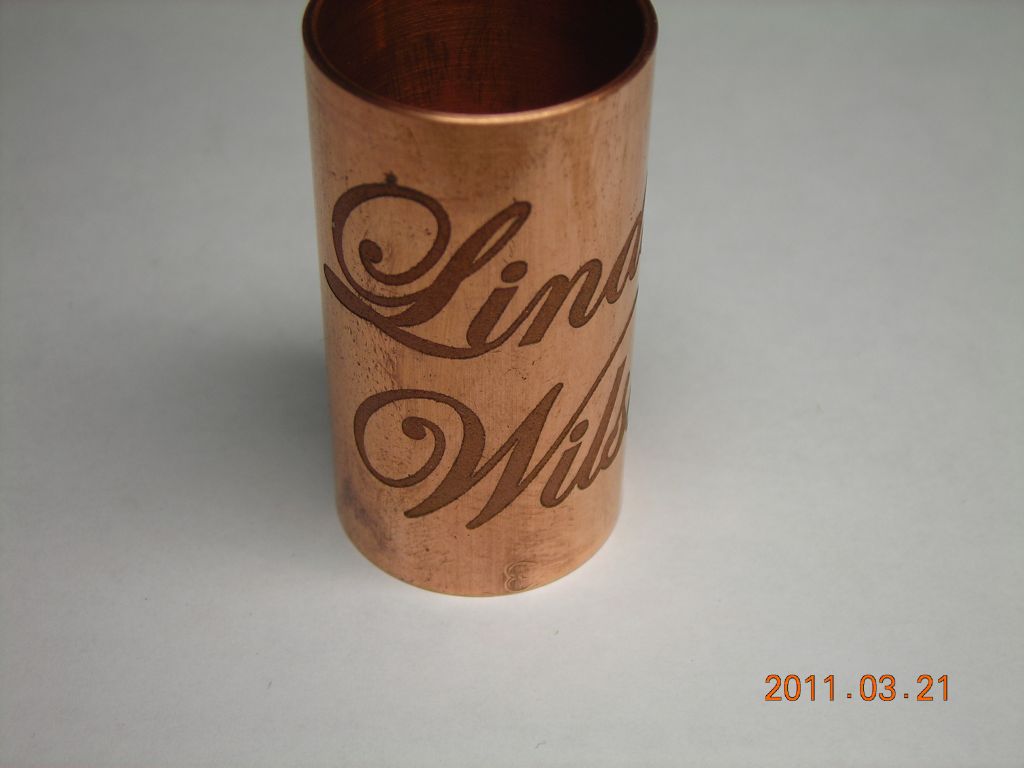 Etching 22mm copper pipe. Didn't go quite so well, probably bad choice of electrolyte. |
 Rest of pipe. |
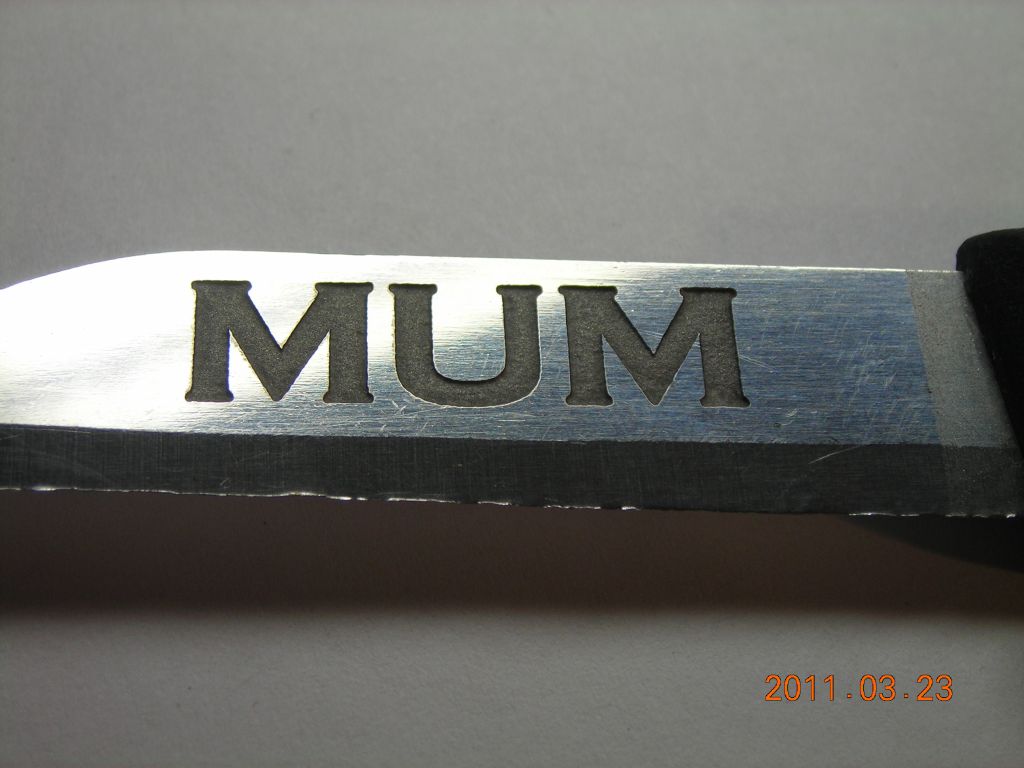 Stainless-steel kitchen knife. Had to be careful not to etch right through! |
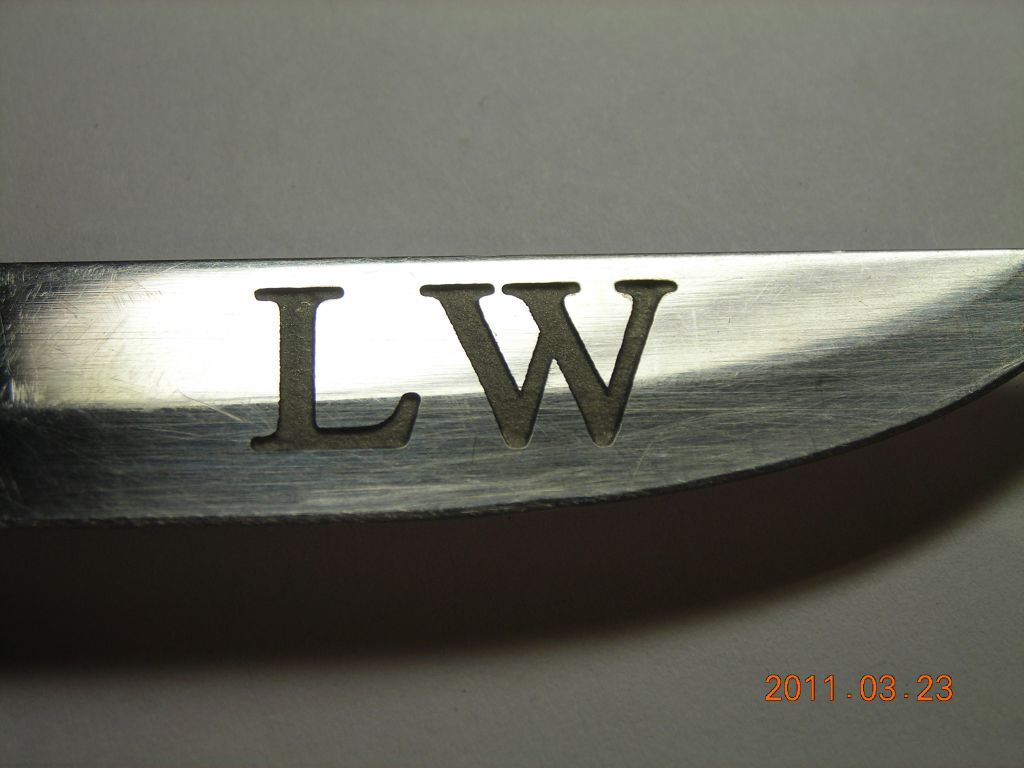 Another stainless-steel knife |
05/03/11: It turns out that proper stainless-steel sheet does not work so well. I tried etching a piece of 304 sheet and it did not go well - etching only occurred near the edges of the mask and required nearly 4A of current to do anything. It also generated a lot of chlorine gas at the anode. It's quite possible that a salt solution is not the best electrolyte to use for etching stainless. The kitchen knife blades probably worked because they were a different grade of stainless, maybe more "steely" and less "stainlessey"!
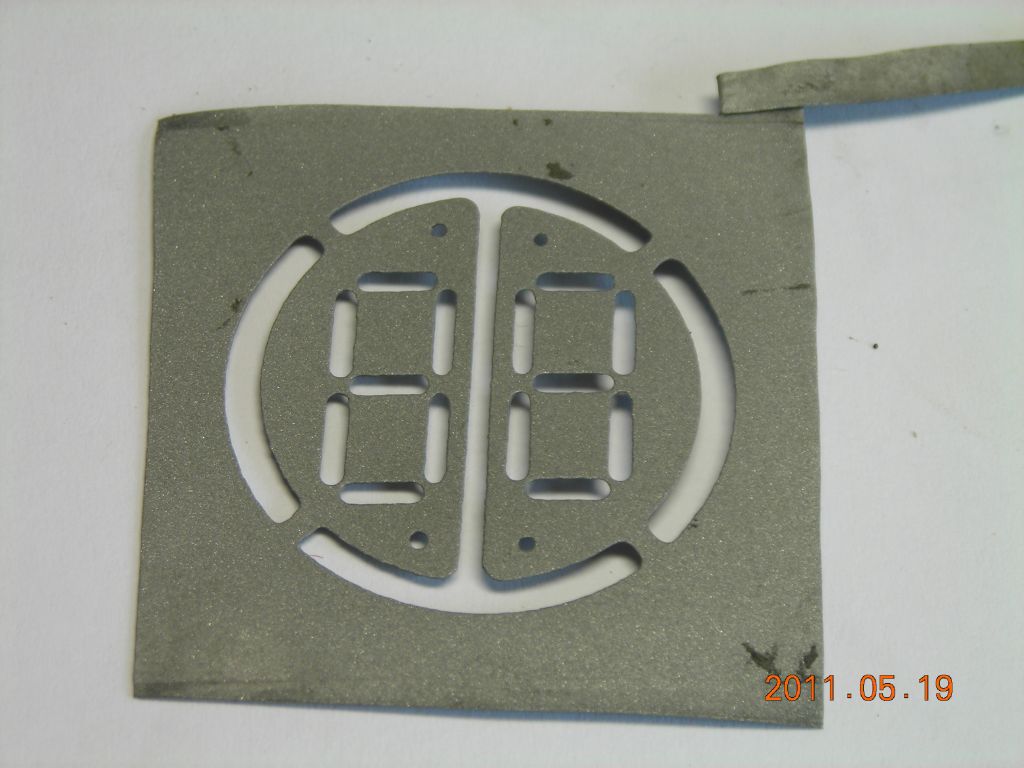
18/05/11: Some more examples. These are the anodes for a type of Panaplex display I'm working on, again etched from 0.25mm steel sheet. They are about 22mm diameter overall.
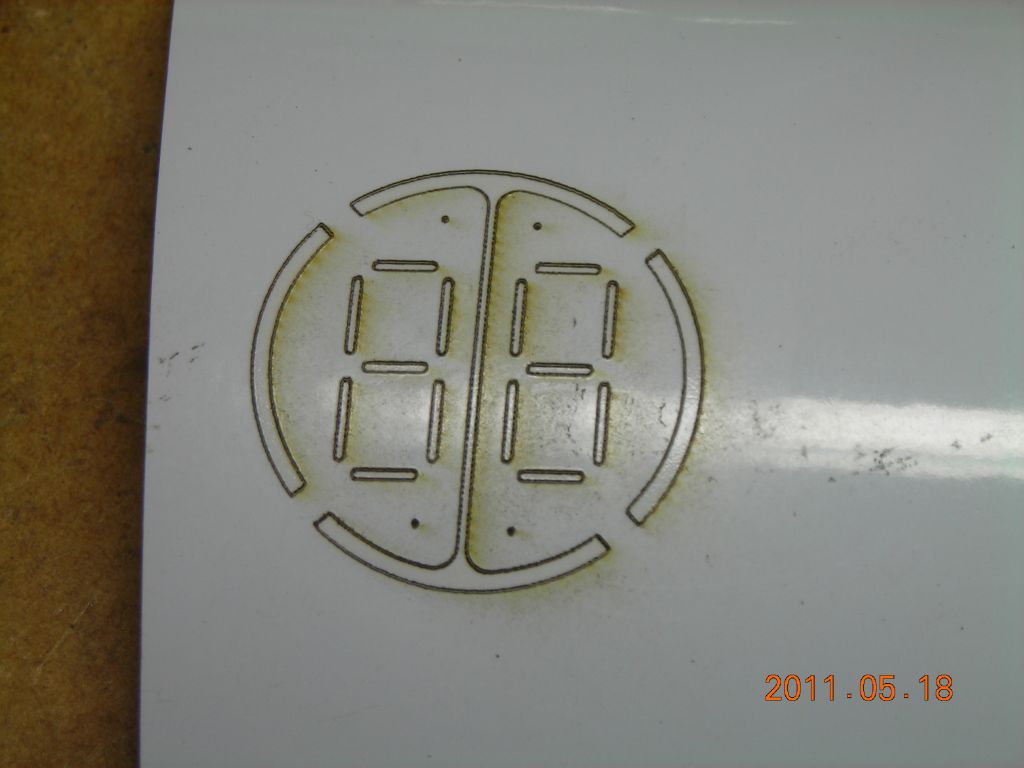 Vinyl mask after laser-cutting. |
 After etching, with the masks still on the sheet. |
 Masks removed. |
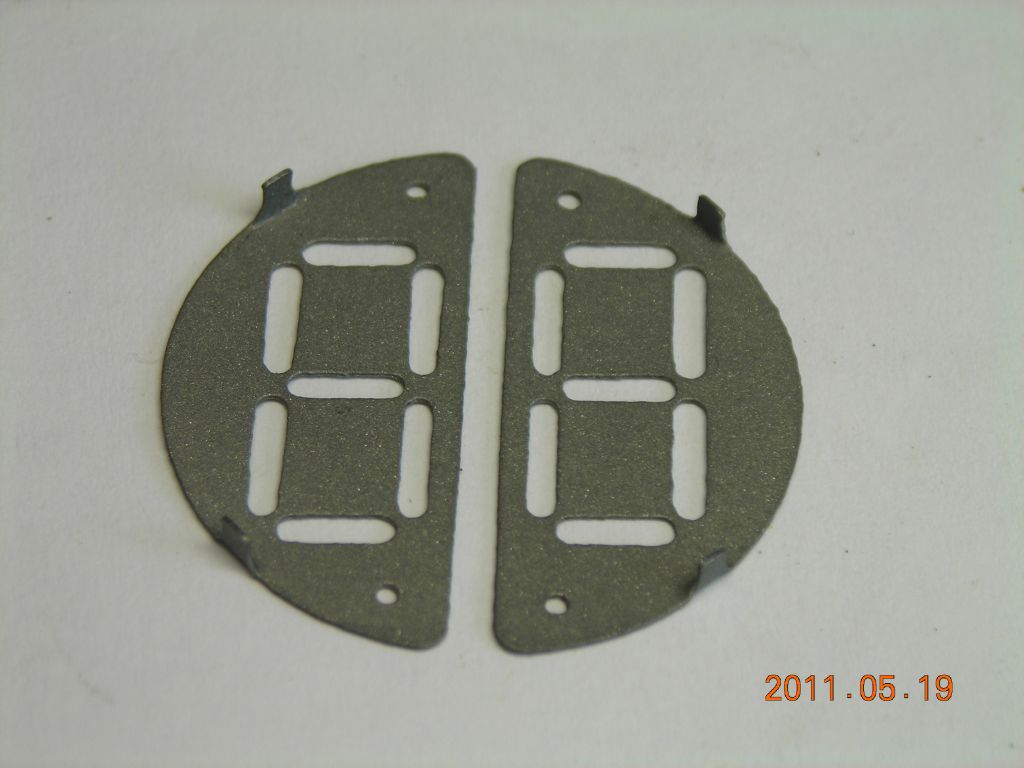 Anodes separated from sheet and tabs bent. |
| ▲ Workshop |